Injection molding is a widely used manufacturing process that creates plastic parts by injecting molten material into a mold. It is used across various industries, from automotive and electronics to medical devices and consumer products. Industrial injection molding machines, however, can be quite expensive, limiting their accessibility to large companies or well-funded businesses. Fortunately, for hobbyists, makers, and small businesses, building your own DIY injection molding machine can be a cost-effective and rewarding project.
Creating a DIY injection molding machine gives you the ability to prototype parts and experiment with various designs and materials without the need for expensive equipment. In this article, we’ll cover everything you need to know about building your own injection molding machine, from the basic components and materials to a step-by-step guide on how to put it all together.
What is Injection Molding?
Injection molding is a manufacturing technique where molten plastic or metal is injected into a mold under high pressure. This process creates parts of nearly any shape and size. Typically, industrial injection molding machines can produce thousands or even millions of parts per day, making it ideal for mass production.
For smaller-scale projects, DIY injection molding is an excellent way to create custom parts, prototypes, or even small batches of products. The ability to build your own machine allows for flexibility and experimentation, and can provide a valuable hands-on experience for makers and engineers alike.
Why Build a DIY Injection Molding Machine?
Building a DIY injection molding machine might seem like a complex task, but it offers several significant benefits:
1. Cost Savings
Commercial injection molding machines can cost tens of thousands of dollars, making them prohibitively expensive for many small businesses or hobbyists. A DIY injection molding machine, on the other hand, can be built for a fraction of the cost by utilizing affordable materials and components.
2. Learning Opportunity
Creating your own injection molding machine is a fantastic learning experience. It teaches you about mechanical design, manufacturing processes, thermoplastic materials, and the operation of hydraulic or pneumatic systems.
3. Customization
A DIY machine can be built according to your specific needs. Whether you want to produce small, intricate parts for prototypes or run small batches of parts, your machine can be customized to fit those requirements.
4. Prototyping and Small-Batch Production
For hobbyists, inventors, or small businesses, a DIY injection molding machine provides a perfect solution for prototyping and low-volume production. It allows for rapid iteration of designs without needing access to industrial-scale machines.
Essential Components of a DIY Injection Molding Machine
Before building your own machine, it’s essential to understand the key components that make up an injection molding system. Here’s a breakdown of the major parts of a DIY injection molding machine:
1. Heated Barrel
The heated barrel is where the plastic material is melted before it is injected into the mold. Heating elements, such as resistance coils or hot plates, are used to raise the temperature of the plastic until it reaches a liquid state.
2. Injection Plunger
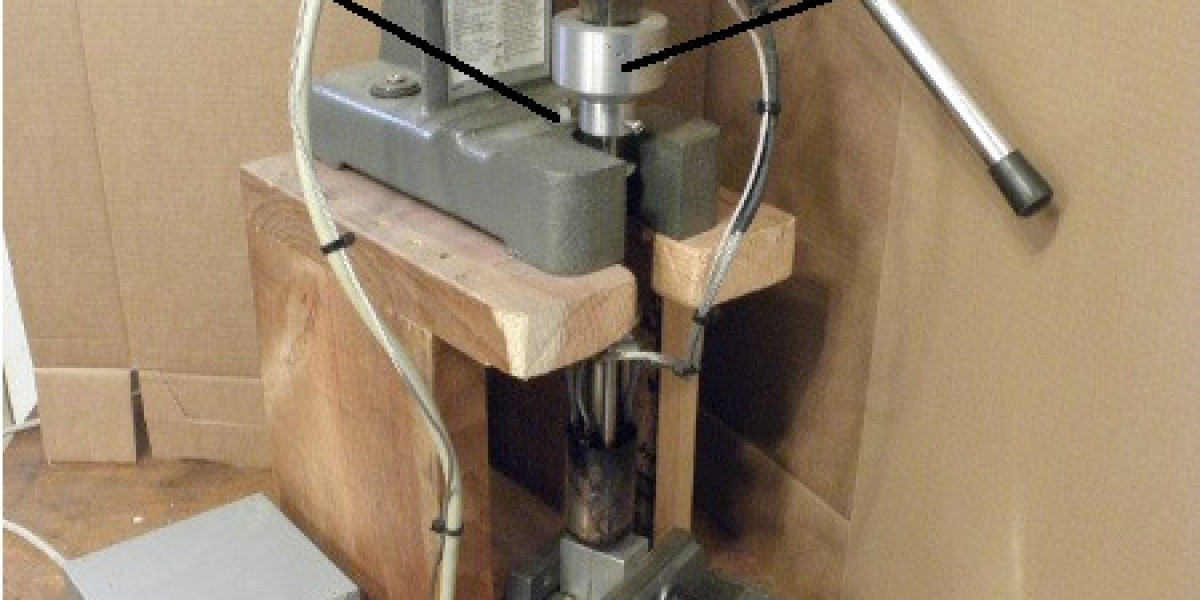
The injection plunger, or piston, is responsible for forcing the molten plastic into the mold cavity. It is typically powered by a manual or hydraulic system. The plunger should have enough force to push the plastic into the mold under high pressure.
3. Mold
The mold is the cavity into which the molten plastic is injected. It defines the shape and structure of the final part. Molds can be made from various materials, including steel, aluminum, or even 3D-printed plastic. The mold should be precisely engineered to ensure accurate part dimensions.
4. Clamping System
The clamping system holds the mold halves together during the injection process. It prevents the mold from separating under the high pressure of the injected plastic. A manual or mechanical clamping system can be used to secure the mold.
5. Cooling System
Once the molten plastic has been injected into the mold, it must cool and solidify. The cooling system ensures that the plastic part maintains the correct shape and solidifies properly. Water-cooling channels or a fan system can be employed to cool the mold.
6. Control Mechanism
In some advanced DIY machines, you may want to include a control mechanism to regulate the temperature, pressure, and clamping force. This could be a manual system or automated with sensors and microcontrollers, depending on the complexity of the machine.
Step-by-Step Guide to Building a DIY Injection Molding Machine
Now that we understand the basic components, let’s walk through the process of building your own DIY injection molding machine. The design and complexity will depend on the materials you use and the type of machine you want to build.
1. Designing the Machine
Before you start gathering materials, it’s essential to have a design plan. Decide on the size and scope of the machine, and ensure that your design can handle the parts you want to create. Sketch out the machine’s frame, the heated barrel, the plunger system, and the mold.
If you’re building a small-scale DIY machine, a simple manual design with a basic hydraulic or mechanical injection system may be sufficient. If you want to add more complexity, consider incorporating a temperature control system or hydraulic controls.
2. Gathering Materials and Tools
Once your design is complete, gather the materials you will need. Some common materials and components include:
Steel or aluminum for the frame and mold
Heater bands or hot plates for heating the barrel
Pneumatic or hydraulic components (if using a powered system)
Plastic pellets (e.g., ABS, PLA, or PET) for molding
Basic hand tools (welding equipment, drills, saws, clamps, etc.)
You may also need specialized tools for machining components to the required dimensions.
3. Constructing the Frame
Start by building the frame that will support all the components of your machine. The frame should be sturdy and stable to ensure that the mold and injection system stay in place during operation. Welding or bolting the frame together is a common method, depending on your materials.
4. Building the Heated Barrel
Construct the barrel that will hold the plastic pellets and melt them. Attach the heating elements around the barrel to maintain a consistent temperature. Ensure that the barrel is sealed tightly so that no plastic leaks out during the injection process.
A simple, heated barrel can be made using a metal pipe or tube, with electric heating bands wrapped around it. Be sure to include a way to insert and remove plastic pellets.
5. Creating the Mold
The mold is the most crucial part of the injection molding process. It is typically made from aluminum or steel to withstand the high pressure and heat. The mold should be precisely machined to match the desired shape of the part.
You can create the mold yourself using a CNC machine, a lathe, or even 3D printing, depending on the complexity of the part. The mold should have two halves that can be clamped together to form a sealed cavity.
6. Setting Up the Injection System
The injection system is responsible for pushing the molten plastic into the mold. If you're building a manual system, you’ll need a plunger or piston that can be inserted into the heated barrel. This plunger can be powered by hand, or you can use a hydraulic or pneumatic system to automate it.
The plunger must have enough force to inject the molten plastic under high pressure into the mold cavity.
7. Cooling System
Once the plastic has been injected into the mold, it must cool to solidify. A basic cooling system may involve water channels inside the mold or an external fan system. Be sure to allow for adequate cooling time to ensure the final product is properly formed.
8. Testing and Adjusting
After assembling the machine, conduct several test runs to ensure that the injection system works properly. Test with small amounts of plastic to see how the molten plastic fills the mold and to make sure the cooling system is effective.
If the machine isn’t functioning as expected, you may need to adjust the heating temperature, pressure, or the clamping system.
Safety Considerations
Safety is crucial when building and operating an injection molding machine. Be sure to follow these safety tips:
Wear heat-resistant gloves when handling the heated barrel and plastic.
Use goggles to protect your eyes from molten plastic or debris.
Ensure the machine is securely bolted down and stable to prevent accidents during operation.
Avoid direct contact with heating elements or the molten plastic.
Work in a well-ventilated area, especially when melting plastic, to avoid inhaling harmful fumes.
Conclusion
Building your own DIY injection molding machine can be a rewarding project that offers both practical and educational benefits. By following the steps outlined in this guide, you can create a custom machine that allows you to prototype parts, experiment with different materials, and produce low-volume products. Whether you’re a hobbyist, inventor, or small business owner, this machine can open up a world of possibilities in the world of plastic manufacturing


